
Height of Cut Buddy Sticker Fitment
Date: 05-01-2023
HOC Buddy Sticker Fitment
Thanks for purchasing our BCMS Height of Cut Indicator, below is how to video with tips and tricks on the fitment of the sticker. Heres a quick how to explanation with tips.
What youll need:
- Masking Tape
- Methylated Spirits or Isopropyl (to clean mower)
- 7/16(11mm) & 9/16 (14mm) Spanner
- Scissors
- Hammer
- Height of Cut Bar/Verners (optional)
- Turn down Height Adjuster Spindle till the bedknife is flush on the ground (ensure surface is flat)
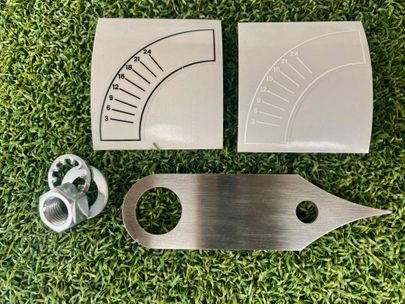
- Start by fitting the Brushed Stainless Steel HOC indicator, to do this youll need to remove your 1/4 bolts that holds your front bracket on, likewise youll need to remove the bolts from your front axle.
- Fit the internal star lock washer, washer and 3/8 nut onto your axle and fit the HOC buddy. Fitment will be tight and may require a light tap with a hammer to help the locating hole sit over the front Axle.
- Cut the sticker to shape to make an arc (as seen in video)
- Without removing the sticker, hold sticker in place with the masking tape to allow for adjustment.
- Check point of sticker sits in the middle of the indicator line of the sticker for the 3mm.
- Check HOC with Bar or Verners if you have them (optional)
- Peel back sticker and place
- Remove masking tape
- Enjoy
This indicator has been tested and sits within 1mm of HOC. Regardless it will be true for your height of cut on your lawn and allow you to adjust will more accuracy. Note that if you require a more accurate set up we recommend a digital heigh of cut guage. PEASE LIKE AND SUBSCRIBE TO OUR CHANNEL.